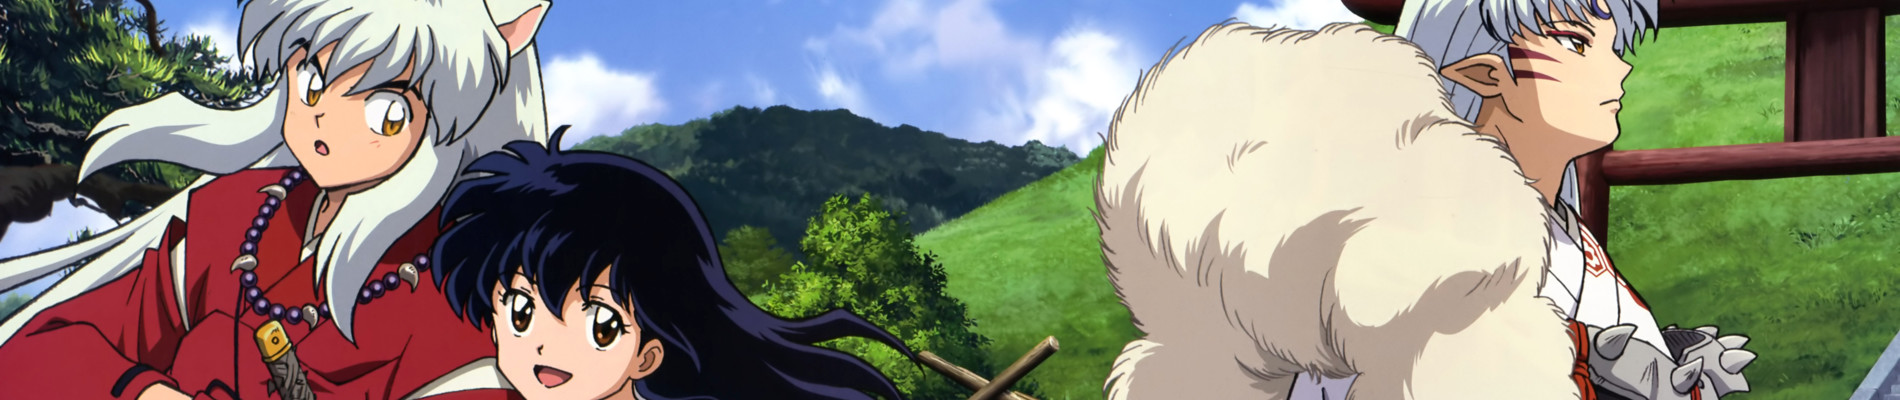
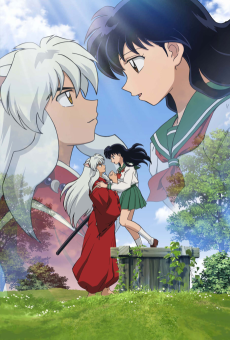
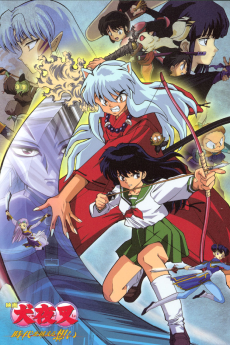
Inuyasha: Kanketsu-hen
▶ Trailer
Studios
Staff
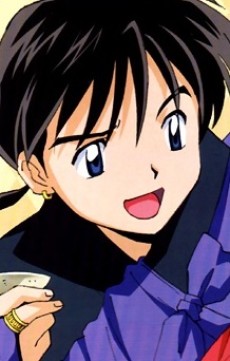
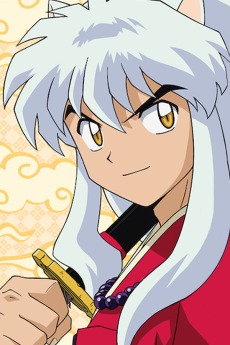
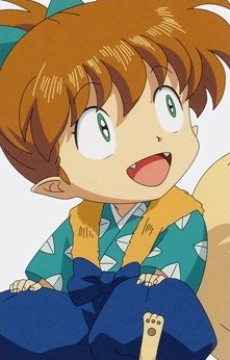
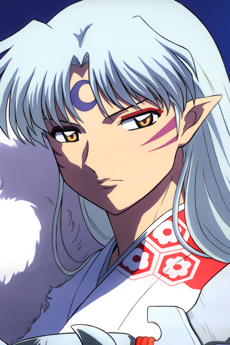
Characters
Where to watch
Tags
Related works

Episodes (26)
1 / 2- 1EP 1
Kagura betrays Hakudoshi to save Kohaku while Naraku's heart is revealed inside Moryomaru.
Oct 4, 2009Hakudoshi tricks Kagura into freeing Goryomaru to retrieve Shikon Jewel shards, but she betrays him after seeing Kohaku’s resolve to destroy Naraku. Hakudoshi gives a shard to Goryomaru, who reveals his true name as Moryomaru and pursues Kohaku. Naraku, having observed the events, removes Hakudoshi’s barrier and the Saimyoushou, enabling Miroku to trap Hakudoshi in his Wind Tunnel. Kagura learns that The Infant, containing Naraku’s heart, resides within Moryomaru, forcing her to flee for her life. Moryomaru escapes to grow stronger. Kohaku reunites tearfully with Sango, regaining memories of their sibling bond. Meanwhile, Kikyo’s spiritual shield weakens, failing to keep novice monks at bay as her condition deteriorates.
- 2EP 2
Kagura's Wind: Kikyo seeks aid while Kagura dies and Sesshomaru fights Moryomaru
Oct 11, 2009Kikyo weakens from Naraku's miasma and summons priestess Midoriko to restore her powers. She tells Inuyasha that the Shikon Jewel must be purified with Naraku upon his absorption. Kohaku informs the group of this plan. Meanwhile, Koga completes trials to obtain the Goraishi, gaining a clawed weapon and ancestral spirit protection that prevents Midoriko's will from freezing his legs once. Kagura meets Naraku, who returns her heart before impaling her with miasma, leaving her near death. She escapes on a feather to a flower-filled meadow, listening to her heart beat. Sesshomaru fights Moryomaru, who wears the armor of turtle demon Meioju. Sensing Kagura's blood, Sesshomaru ends the battle, shattering his sword Tokijin. He finds her dying in the meadow. She is happy to see him one last time before her body dissolves into dust, and her feather hairpin floats away, signifying her freedom.
- 3EP 3
Sesshomaru masters Meido Zangetsuha while Inuyasha faces Mujina the badger demon
Oct 18, 2009Totosai informs Sesshomaru that Tenseiga can be reforged into an offensive weapon because he has felt rage and sorrow for another. Meanwhile, Kagome’s grandfather explains that the Shikon Jewel can only be erased by the correct wish, distracting her from academic worries. Inuyasha and his companions encounter an inn where fox demons trick people to advance in rank. Miroku falls for a disguise, angering Sango, while Shippo tricks Inuyasha before meeting Mujina, a badger demon seeking revenge for her father. Mujina absorbs energy from Tetsusaiga, but Inuyasha blocks the attack and reveals her true form, sending her flying. Sesshomaru learns the Meido Zangetsuha technique, which cuts a path to the Underworld. With this new power replacing Tokijin, he resolves to determine if Kagura’s death was in vain.
- 4EP 4
Inuyasha's Tetsusaiga gains demonic absorption after swordsmith Toshu's death
Oct 25, 2009Inuyasha's group saves swordsmith Toshu from demon Ryujin, who seeks the Dakki sword. Toshu uses Dakki to drain Ryujin's energy, but attempts to steal Tetsusaiga's power, causing his own transformation and death. The sword breaks, transferring its absorption ability to Tetsusaiga. Meanwhile, Naraku's incarnation Byakuya sends wolf demon Koga to retrieve Koga's shards for his brother Shinta. Moryomaru intercepts them, absorbing the older brother's shard while Shinta is rescued. Inuyasha arrives with the enhanced Tetsusaiga, forcing Moryomaru to flee despite absorbing the Adamant Spears. The weapon's overwhelming power backfires, wounding Inuyasha. Byakuya reports this to Naraku, who wonders if Tetsusaiga will destroy its owner or defeat its enemies.
- 5EP 5
The Great Holy Demon Spirit's Test
Nov 1, 2009Kohaku offers his shard to Kikyo to kill Naraku, while Koga abandons Ginta and Hakkaku due to rising danger. Moryomaru consumes Kinka and Ginka, gaining their fire and lightning powers to enhance his armor. Sesshomaru tries to use Meido Zangetsuha against Moryomaru, but Byakuya interferes per Naraku's orders. Totosai directs Inuyasha’s group to demon hermit Yorei-Taisei for sword training. They find Yorei-Taisei missing organs and villagers transformed by an organ thief demon. Tetsusaiga is chained until the thief is defeated. After a serpent demon sweeps away the group except Kagome, Inuyasha faces a male ox demon. Using his nose to locate Yorei-Taisei’s energy in vortexes, Inuyasha draws Tetsusaiga, cuts the correct vortex, and passes the test, though one final technique remains undiscovered.
- 6EP 6
Naraku uses Yomeiju to defeat Moryomaru while Miroku suffers fatal poisoning
Nov 8, 2009Naraku revives and absorbs the demonic tree Yomeiju, fleeing from Inuyasha and his companions. Kikyo encounters Koga for the first time as Moryomaru emerges from a mountain without noticing them. Inuyasha's group observes an evenly matched battle between Moryomaru and Naraku. Moryomaru consumes Naraku to seize his jewel shards and captures Koga, but this is a ruse. Naraku penetrates Moryomaru's armor using the tree's tendrils, destroying him from within. After Koga frees himself, Miroku attempts to use his Wind Tunnel against Naraku. He refuses to close the technique despite pleas, until miasma causes him to bleed from his face, allowing Naraku to retreat. Severely poisoned and near death, Miroku cannot be fully healed by Kikyo's purification abilities.
- 7EP 7
Kagome seeks the sacred bow at Mount Azusa to save Kikyo from Naraku's corruption.
Nov 15, 2009Kikyo partially heals Miroku using her life force, reopening her wound, while Naraku reabsorbs Onigumo to gain spiderweb abilities. He captures Kikyo, neutralizing her purification powers and infecting her with evil will. Inuyasha and Kagome become entangled in webs while rescuing her. Kagome witnesses a vision of Inuyasha and Kikyo’s tragic separation fifty years ago. Attempting to heal Kikyo with her longbow, Kagome fails as the string snaps from defilement. Kikyo directs Kagome to the Mausoleum of Mount Azusa for a special bow. Meanwhile, Byakuya poisons Kohaku with snakes but flees when Sesshomaru’s group arrives. At the mausoleum, a spirit guardian resembling Kikyo provides the bow. Kagome faces a test involving a cliff and her own insecurities, ultimately passing to secure the sacred weapon. Naraku, seeing Kagome freed, plans to kill Kikyo personally to stop her purification.
- 8EP 8
Among the Twinkling Stars
Nov 22, 2009Naraku captures the group to seize Koga’s shards while Inuyasha fights him. Kikyo prevents Kagome from using the sacred longbow, causing Naraku to drop her and expose the Shikon Jewel inside his body. Koga charges for the shards but gets trapped, though Miroku and Inuyasha rescue him at the cost of the lost shards. Kikyo holds the Jewel and urges Kagome to shoot her. The arrow purifies the Jewel, but Naraku’s demonic energy taints it, weakening Kikyo. Wounded, Naraku retreats. Inuyasha kisses Kikyo as she dies peacefully, and her soul collectors guide her spirit to rest among the stars.
- 9EP 9
Sesshomaru enters the Underworld to save Rin and Kohaku from the Guardian
Nov 29, 2009Koga departs with Ginta and Hakkaku, leaving Inuyasha’s group. Sesshomaru visits his mother to enhance his Meido Zangetsuha, prompting her to summon a hellhound from her Meido Stone. This event drags Kohaku and Rin into the Underworld void. Sesshomaru pursues them, defeats the beast, and rescues the pair, but Kohaku observes that Rin has stopped breathing. Enveloped by darkness, Sesshomaru confronts the Guardian of the Underworld to save her. He realizes he cannot resurrect Rin, as he already did so previously. After purifying the corpses, Sesshomaru uses a wider Meido Zangetsuha pathway to return to the physical world. His mother revives Rin with her Meido Stone after scolding him for believing Tenseiga could cheat death. She warns Kohaku that his life, prolonged by a jewel shard, remains vulnerable to death despite the sword's power.
- 10EP 10
Kanna bids farewell at the meadow while the group faces the Flower Prince and mirror demon
Dec 6, 2009Kanna visits the meadow where Kagura died, discarding her fan into a pond to say goodbye. Naraku remains irritated by the Shikon Jewel's remaining purity. Inuyasha and his companions reach a village where residents are unnaturally joyful due to the Flower Prince, a demon who removes sorrow before turning people into soil. Inuyasha falls for an illusion involving Kikyo, but Kagome defeats the demon and clears the flowers. Later, Byakuya instructs Kanna to trap the group using her mirror. At the pond, a mirror demon emerges and steals Tetsusaiga's powers, forcing Inuyasha and his friends to escape.
- 11EP 11
Kanna's Gravestone
Dec 13, 2009Inuyasha's group takes refuge in a cave protected by Miroku's barrier, but a mirror demon breaches it. Tetsusaiga amplifies Inuyasha's full-demon power to aid the battle. Kanna heals the mirror demon by transferring its injuries to herself. Inuyasha destroys the replica Tetsusaiga, restoring his original sword's power and his half-demon form. Despite sustaining heavy damage, Naraku commands the mirror demon to approach the group and self-destruct. She refuses, standing still in disobedience. Naraku crushes Kanna's heart, shattering her into glass pieces. A shard pierces Kagome's eye, allowing her to hear Kanna's final message that light will destroy Naraku. Kagome later reveals that Kanna did not wish to die, explaining why she needed Kagome to hear those last words.
- 12EP 12
Sango's Feelings, Miroku's Resolve
Dec 20, 2009Miroku is poisoned while fighting a bone-collecting demon, prompting Sango to coat her Hiraikotsu in corrosive poison to destroy the enemy. Inuyasha attacks the demon's master, and Myoga suggests repairing the weapon with a drunken sage. The Master of Potions dissolves the Hiraikotsu, causing Sango to enter a jug to pacify the spirits within. The sage offers Miroku a drink that masks pain from miasma but does not stop its spread, a necessary price for protecting Sango. The spirits, though initially angry, accept Sango's willingness to sacrifice herself and restore the weapon. However, the Master of Potions warns that the Hiraikotsu has been altered by his herbs and poisons.
- 13EP 13
Sesshomaru Faces Shishinki's Meido Zangetsuha and Inuyasha's Interference
Dec 27, 2009The demon Shishinki attacks Sesshomaru with a complete Meido Zangetsuha, claiming Sesshomaru’s father stole it. Shishinki absorbs Sesshomaru’s counterattack and taunts him about Tetsusaiga belonging to Inuyasha instead. Inuyasha interrupts the fight, but Sesshomaru orders him to stay out. Myoga informs Sesshomaru that their father gave him Tenseiga because he knew Sesshomaru could master the technique. Despite Shishinki’s doubts and repeated assaults, Sesshomaru defeats him with a massive complete Meido Zangetsuha. Afterward, Inuyasha argues that Tenseiga is a meaningful keepsake. Before leaving with his group, Sesshomaru declares that he and Inuyasha are destined to fight each other for the rest of their lives.
- 14EP 14
Byakuya witnesses the battle aftermath while Naraku faces resistance from Kohaku and Sango
Jan 3, 2010Byakuya observes the results of the conflict between Sesshomaru and Shishinki. Totosai explains that Sesshomaru’s father provided Tenseiga to refine Meido Zangetsuha, allowing Tetsusaiga to absorb it. Naraku attempts to seize Kohaku’s jewel shard but finds it purified by Kikyo’s spiritual energy. Kohaku battles Naraku alone to defend Jaken and Rin. Inuyasha’s group bypasses Byakuya to confront Naraku, who taunts Sango about Kohaku’s past. Sango asserts she would still fight for him and attacks with Hiraikotsu, which now possesses demonic energy capable of wounding Naraku. Despite attacks from Inuyasha, Kagome, and Miroku, the injured Naraku escapes. Kohaku reveals that the shard remains pure, offering potential utility in the final confrontation.
- 15EP 15
Sesshomaru Challenges Inuyasha to Prove His Worth With Tenseiga
Jan 10, 2010Sesshomaru uses a mirror fragment from Kanna, provided by Byakuya, to empower Tenseiga with Tetsusaiga’s abilities. He challenges Inuyasha to a duel to determine his right to wield their father’s fang of destruction. As the swords clash, Tetsusaiga recovers lost power. Sesshomaru attacks Inuyasha with Meido Zangetsuha and traps Tenseiga within it. Inuyasha cuts through the demonic energy to escape. Naraku attempts to control Tenseiga via the mirror, but Sesshomaru enters the underworld and compels Inuyasha to shatter the sword. Tetsusaiga turns black, allowing Inuyasha to exit the realm. The broken Tenseiga is restored, freeing Sesshomaru from his obsession and bringing him closer to acquiring a unique, powerful weapon independent of his father’s legacy.
- 16EP 16
Naraku uses the Shikon Jewel to control Hitomiko and trap Kagome behind a barrier
Jan 17, 2010Naraku fatally wounds Hitomiko, a priestess with powerful spiritual abilities he attempted to kill fifteen years ago. He employs the Shikon Jewel to sustain her life and utilizes spiderwebs to manipulate her actions. Under his control, Hitomiko constructs a formidable barrier that ensnares Kagome, initiating a process of torture. Kagome shoots the spider controlling Hitomiko, fearing this act might corrupt Hitomiko’s soul and spiritual powers. Upon firing her sacred arrow, a massive light purple ray of intense spiritual energy emerges. This power allows Hitomiko to pass away peacefully in Kagome’s arms. Before dying, Hitomiko informs Kagome that she senses Kagome possesses extensive spiritual powers that are currently sealed.
- 17EP 17
Sesshomaru battles Magatsuhi to protect Kohaku while Inuyasha confronts the Shikon Jewel's evil will
Jan 24, 2010Inuyasha visits Kaede to report Kikyo's death, learning that Kagome’s spiritual power was sealed by Magatsuhi, the Shikon Jewel’s malevolent will. To combat Kikyo’s influence, Naraku grants Magatsuhi a physical body using his own flesh, commanding the entity to retrieve Kohaku’s jewel shard. Sesshomaru defends the boy without his left arm or weapon until Inuyasha’s group arrives to find Sesshomaru injured and the shard defiled. Magatsuhi incapacitates Kagome, prompting Sesshomaru to heal and transform, though his attacks fail. After Sesshomaru is trapped but breaks free, Totosai restores his left arm and provides the Bakusaiga sword. This new blade rots its targets, forcing Magatsuhi to flee after destroying its vessel. Kagome eventually awakens, appearing confused by the events.
- 18EP 18
Inuyasha and Sesshomaru's groups visit Kaede's village while Kagome faces spiritual challenges.
Jan 31, 2010Inuyasha and Sesshomaru's groups go to Kaede's village, where Kohaku remains unconscious due to the defilement of his jewel shard, but not even Kagome can purify it, seemingly due to Magatsuhi's mental attack against her. After Totosai makes a scabbard for Bakusaiga, Sesshomaru leaves Jaken and Rin with Kohaku to hunt down Magatsuhi. Kagome decides to return home to take her high school entrance exams, promising to return when they are done. However, Kagome is at a loss since her family is away on a trip, the school is closed and her friends are unavailable. Inuyasha visits her, advising her to stay at home until Naraku is defeated, and he believes her spiritual powers and abilities were sealed by Kikyo's final wish not to fight anymore. Kagome wants to keep her promise to Kikyo instead and to make the one correct wish that will make the sacred Shikon Jewel disappear from world of the living forever. Inuyasha vows to protect Kagome with his life, and they almost kiss passionately, but are interrupted by the sudden return of her family. Ten days later, Kagome goes on her way by train to take her entrance exams, but is persistently followed by Inuyasha. Kagome's bag gets caught in the train when exiting, but Inuyasha carries her after the train to retrieve her bag. Inuyasha takes her to the exam site, where her mother meets her with the exam ticket she somehow left at home.
- 19EP 19
Magatsuhi Seizes Kohaku While Sesshomaru Battles Byakuya's Demons
Feb 7, 2010Sesshomaru attacks an illusion of Magatsuhi created by Byakuya, while the real spirit takes over Kohaku’s body at Kaede’s village. Magatsuhi severely injures Miroku and Sango, knocking Rin unconscious, before escaping. Miroku attempts to use his Wind Tunnel but fails, sustaining critical wounds. Sesshomaru discovers the deception and uses Bakusaiga to defeat the thousand demons summoned by Byakuya. Meanwhile, Sango kisses the unconscious Miroku and pursues Kohaku. Inuyasha and Kagome join the chase. Magatsuhi reveals Kohaku is reliving the slaughter of his father and comrades. Responding to his sister’s plea, Kohaku uses the remaining pure light in Kikyo’s jewel shard to break the spirit’s control. He jumps into a canyon to force Magatsuhi to leave his body.
- 20EP 20
Kohaku Expels Magatsuhi While Naraku Captures Kagome for the Jewel Shard
Feb 14, 2010Kohaku expels Magatsuhi from his body as Sesshomaru arrives to destroy Naraku’s appendages with Bakusaiga and sever Magatsuhi with Tenseiga. Naraku escapes, captures Kagome, and demands Kohaku’s jewel shard in exchange. Kohaku spots a sacred arrow, stabs Naraku’s shoulder, and shatters his turtle armor, forcing a retreat. Meanwhile, a Magatsuhi fragment possesses Rin to escape with a demon as Miroku faces the Wind Tunnel. Kokaru reunites with the group, but Naraku’s flesh pierces Kohaku’s neck to steal the shard. Sango’s grief summons Kikyo’s spirit, who revives Kohaku with her light. With the Shikon Jewel now complete in Naraku’s possession, the final conflict between light and darkness commences.
- 21EP 21
Kagome faces high school prospects while Inuyasha succumbs to the Shikon Jewel's corruption.
Feb 21, 2010Kagome learns she is on the high school waiting list after graduating middle school. Hojo attempts to give her a second button but she departs before he can. Naraku absorbs Shikon Jewel power, spreading a dark cloud. Inuyasha's group hunts Naraku, leaving Shippo with Kaede. They encounter Naraku and Byakuya in miasma as Sesshomaru enters Naraku to find Rin. Miroku proposes to Sango inside the cloud. The group realizes the miasma does not harm them because the Jewel seeks their souls. Miroku and Sango are captured while Inuyasha and Kagome search for the defiled jewel. Inuyasha transforms into a full-blooded demon near the Jewel and attacks Kagome. Naraku offers a miasma-coated arrow, which she refuses. He claims Inuyasha will kill her like Kikyo. Inuyasha attacks again, throwing Kagome off a cliff.
- 22EP 22
Naraku's Dark Trap Entraps Miroku, Sango, and Inuyasha in a Battle for Control
Feb 28, 2010Miroku and Sango witness an illusion of his father’s demise, prompting Miroku to suggest separation after saving Sango. Rin, regaining consciousness, is pursued by Magatsuhi, which possesses Inuyasha after he fails to attack it. Sesshomaru and Kagome arrive; Sesshomaru fights the possessed Inuyasha while Kagome retrieves Tetsusaiga, which Magatsuhi discarded. Kagome nearly falls off a cliff but holds on. Inuyasha regains control upon smelling Kagome’s blood and reclaiming the sword. Magatsuhi attempts to possess Kagome, but Inuyasha uses Tetsusaiga to extract the demonic energy. Finally, Sesshomaru employs Tenseiga to permanently dispel the evil spirit, resolving the immediate threat.
- 23EP 23
Naraku attempts to eliminate pure light through illusions targeting Miroku and Sango
Mar 7, 2010Following Magatsuhi's defeat, Kagome's spiritual powers fully awaken as the Shikon Jewel emits pure light. Naraku deploys illusions to destroy this light, tricking Miroku into using his Wind Tunnel and forcing Sango to kill Rin. Inuyasha arrives just in time to stop Miroku. Kagome's sacred arrow strikes Naraku, shattering the illusions and freeing Rin with the Hiraikotsu. Kohaku saves Rin from falling to her death. The group witnesses Naraku's true body as his miasma spreads. Inuyasha launches a Meido Zangetsuha past Naraku, while Shippo observes Byakuya intercepting the attack with a strange blade to drain its energy. Sango shields the awakened Rin from the miasma using her protective mask.
- 24EP 24
Naraku releases miasma while Inuyasha defends allies and Byakuya attacks before the final battle begins.
Mar 14, 2010Naraku releases more miasma, while Inuyasha uses Tetsusaiga's barrier to protect himself, Kagome and Miroku. Sango arrives riding Kirara and throws her Hirakotsu, but it absorbs too much of the miasma and Sango falls through a hole that Naraku opens in his flesh. Miroku follows and she decides to die with him there. When Kagome questions Naraku about whether his real wish has come true, he becomes enraged. As he absorbs the Shikon Jewel, he begins transforming and spreading spiderwebs around the area. Inuyasha unleashes Meido Zangestuha, which takes on the form of slashing blades due to the different nature of his sword. Miroku and Sango fall again, but are joined by Shippo. Byakuya slashes Kagome across the back with his blade, but strangely it leaves no wound. Inuyasha quickly attacks and kills Byakuya, who states that he has fulfilled his purpose. Together, Miroku, Sango, Shippo and Kirara, along with Sesshomaru's group, join Inuyasha and Kagome in the final battle against Naraku.
Similar titles
Frequently asked questions
- How many episodes does Inuyasha: Kanketsu-hen have?
- Inuyasha: Kanketsu-hen has 26 episodes.
- When did Inuyasha: Kanketsu-hen come out?
- Inuyasha: Kanketsu-hen came out in 2009.
- Which studio made Inuyasha: Kanketsu-hen?
- Inuyasha: Kanketsu-hen was produced by Sunrise.
- Who directed Inuyasha: Kanketsu-hen?
- Inuyasha: Kanketsu-hen was directed by Youta Tsuruoka.
- Is Inuyasha: Kanketsu-hen finished?
- Current status of Inuyasha: Kanketsu-hen: Finished.